Saturday, February 28, 2015

A Cute Crocheted Square!

I have mentioned that I will be moving in March.  We are hauling things out of closets and attics and sorting like crazy!  Thinning out ones possessions is a good thing.  I came across a bag of yarn that I have probably had since before I was married.  I have been married for 27 years!  I looked at all the colors and knew what I could do with the yarn.  So in-between sorting and cleaning out I have also managed to start a new project.  The little square is easy to crochet and it is certainly fun to make.  I am including a tutorial here.  Also seen on Dutch Sisters blog.  Begin by chain stitching 6 stitches.

 Close the circle with a slip stitch.
 Chain 3 (will count as 1st double crochet), double crochet 15 stitches into the circle.  16 total.
 Close the circle with a slip stitch.  Chain 4 (4th chain will count as a ch1 between the double crochet stitches).  Make 1 double crochet, ch1 into each stitch below.  16 total.
 Close the circle with a slip stitch.
 Slip stitch into the first chain space and make 3 double crochet stitches.  Make 3 double crochet stitches in all the following chain spaces.
 Make a slip stich to close the circle.  End of your work.
 In a contrasting color make a slip stitch onto your hook.
 Join to your completed circle in any space between the groups of 3 double crochet stitches.
 Chain 3 and slip stitch between a 3 dc group.  Do this 3 times in total.
 To make your first corner chain 5 and slip stitch into the next space between 3 dc groups below.
 3 chain, slip stitch into next space 3 times and then 5 chain into next space.  Repeat twice more to finish your row.
Slip stitch into the 3 chain space and make 3 double crochets (3 chain and 2 dc in first group).  Repeat this 3 times.  You should have a 5 chain space next.
 To make the corner 5 double crochet, 2 chain, 5 double crochet.
 Then 3 groups of 3 double crochet into the next 3 chain spaces.  Repeat corner and work the next two sides.
 I join as you go, so that I don't need to do a bunch of sewing at the end.  There are many good You Tube videos on the join as you go method.
 This is such a cool pattern and it is so colorful.  I hope you give it a try.

Wednesday, February 18, 2015

Hexagon Wall Hanging!

We will be moving next month!  We are leaving Texas for New Hampshire.  I am beyond excited by this new adventure.  We have bought a new home and I can't wait to decorate it.  We have been in our current home for 15 years.  The kids have finished school and are either graduated or in college.  So... my husband and I thought it was just the right time for another adventure.
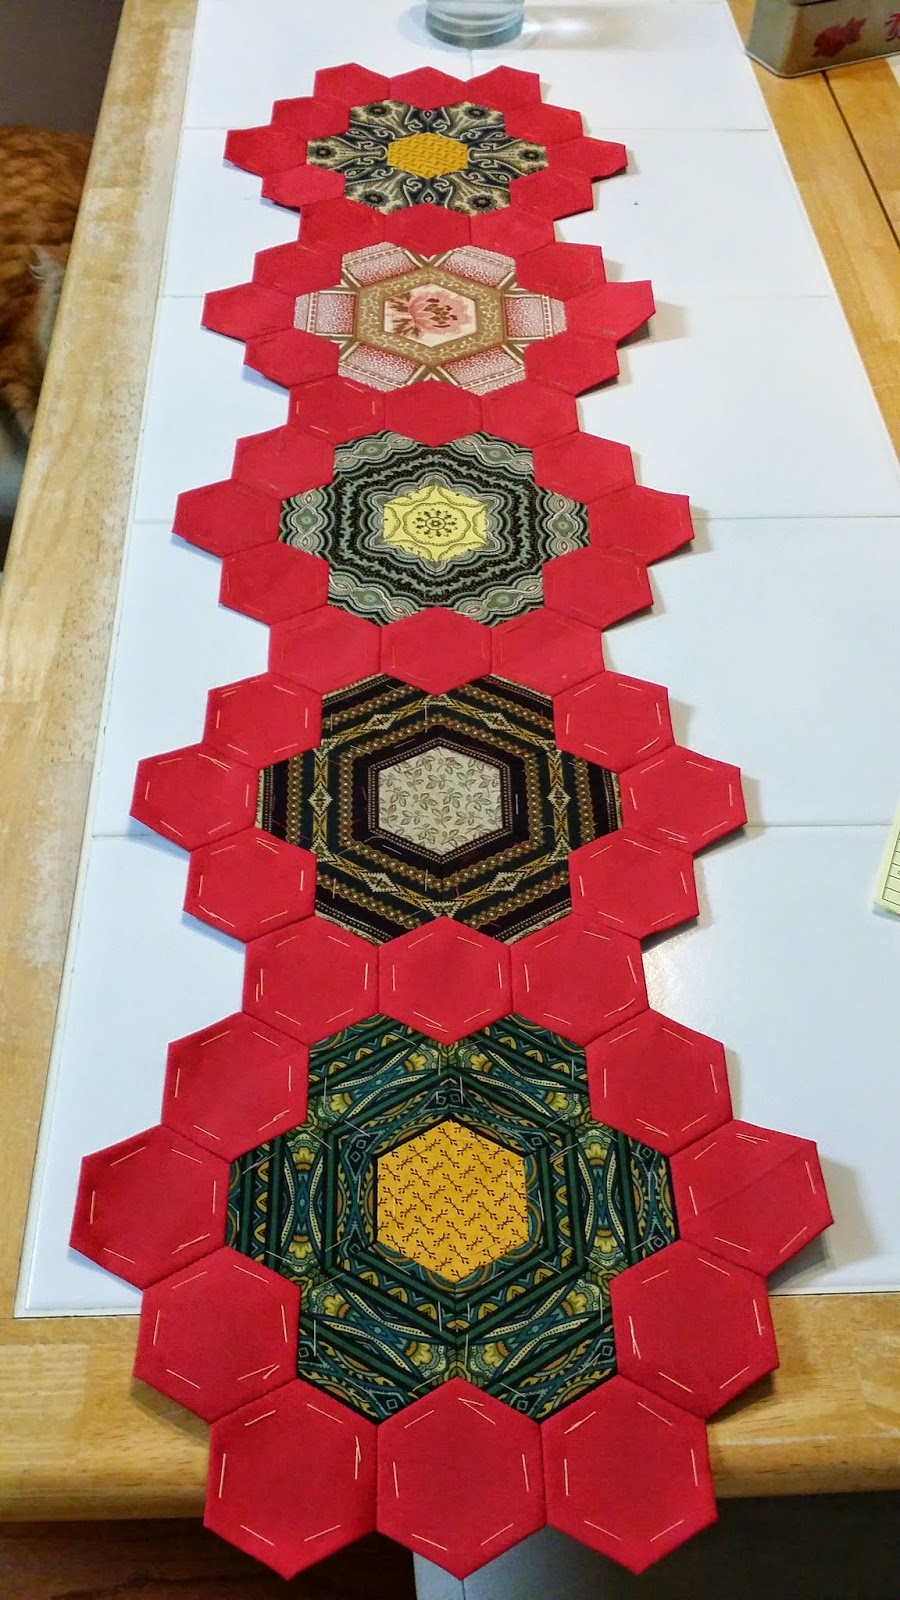
With that being said, of course I need to make a quilt for the new place.  I had started these rosettes a couple of years ago, loved them, but did not know what to do with them exactly.  I just know my dining room in the new house would benefit by a wall hanging of these yummy rosettes.  So I decided on my background fabric - Moda Cherry.  So pretty and full of energy.   I have been making more rosettes!
 Striped fabric is the theme for this quilt.  I love how the stripes give you secondary hexagon shapes within the rosette.
A few of them are not from striped fabric, but also fussy cut.
Here is the beginning of the wall hanging.  I am not sure how wide to make it.  So far I have five in a row.  I may add a sixth one.  I am loving making these again.  I will continue to show the progress on this project.  Thank you for stopping by for a visit.

Friday, February 13, 2015

Pillowcases!

I had bought some cute fabric with birch tree trunks on them.  I thought they would make awesome pillowcases for my son who is a nature boy.  I found some wood grain fabric too.  I used a grunge fabric for the small contrasting strip.
 I did French Seams because I hate raw edges!  They turned out very well.  I love them, and he loves them.

Wednesday, February 11, 2015

Cushion Covers for my Daughters Bed!

A couple of years ago we bought an awesome duvet cover set for my daughters bed.  The print has big doilies on it in purples and pinks.
I was inspired to make cushion covers for her continental pillows (26" x 26") to mimic the cover.  I went through my stash of doilies made over the years and picked out a few that I thought would work and got cracking on the project.  I picked a Moda Solid called Eggplant and quilted it in a crosshatch style.  Small 1/2" blocks.  I used my walking foot as the guide.  The small crosshatch leaves one with a stiffer finish to the fabric and it feels gorgeous to run your hands over it.
 Then I placed the doilies onto the front and appliquéd them down.  Next step was to assemble the cushion.
 I really love how they compliment the cover.  I hope she will love them when she gets back for spring break!