Monday, March 31, 2014

Progress on Live Simply BOM

Over the last week I prepped and appliquéd two more mini quilts for "Live Simply"  block of the month.  I made April and May.  Now what I really need to do is to complete the background fabric and appliqué on which you hang the small mini quilts.  The mini measures 8.5" by 6.5".  They are really fun to make and easy to quilt.  The one with the chick on is April's block.
Here is May's block.  It was a fun one to stitch.  Each block has a few embroidery elements which is really fun.  

Thursday, March 27, 2014

Scrap Management Part 4!

Another form of scrap fabric is those wonderful strings.  Sometimes they are left over from binding.  Mostly, for me, I get them from squaring up my fabric.  I will cut between 1 to 2 inches off of my yardage when squaring it up to use on a project.  I do this intentionally to add to my string bag.  Leftover jelly roll strips are wonderful too.  They don't all have to be long because you will need short pieces to cover a corner if you are doing a strip quilt.
 I am making a spiderweb quilt from my strings.  It uses a kite shape in a solid fabric and then the strings are pieced on the sides on a triangle which needs four triangles to make a block.  Two for a half block, two half blocks for a square.  I have not attached my blocks together yet - I just laid them out for you to see the pattern.  Again - something out of virtually nothing.  I hope this scrap management series has encouraged you to go ahead and use those scraps.

Monday, March 24, 2014

Scrap Management Part 3!

I have another scrappy project to show you.  For this project I typically select fabric which has a straight edge on one end and an uneven edge on the opposite side. Here is an example of what I mean.
 If there is enough space, I cut a 1 1/2" inch strip from the scrap piece.  You can see that there is enough fabric on the left side to cut out a 1/2" hexagon.
 Here I have a few strips ready to sub cut into 1 1/2" squares.
Here they are sub cut into squares.
I add them to to a bag and use them as leader enders for when I am piecing.
 In no time at all you get a bunch of pretty scrappy blocks.  I am doing them in rows of 10 x 10.  I am also alternating the block from a light to a dark.  It just makes the block read better.
 I plan on adding a solid looking bright fabric as sashing.  Maybe a scrappy four patch as a corner block.  The options for scrap piecing are endless.  I love a variety so I will cut different shapes out of the one piece of scrap fabric.

Sunday, March 23, 2014

Scrap Management Part 2!

Last time I blogged I touched on what to do with the teeny tiny bits of fabric.  Today I will show you what I do with pieces which are slightly larger than what I use for the hexagons.  I have a tumbler template which I use to cut out shapes.  I trace the shape onto the fabric and then cut them out.  This is good mindless work to do when I am skypeing with my college kids and listening to their wonderful stories.  Here is a recent addition to the pile.
 Here is a bag full of tumbler shapes waiting to be put into rows and added to the quilt in progress.   On an irregular piece of fabric I can often get a tumbler and a hexagon shape out of it.  If it is just too small for the tumbler I know a hexagon paper will fit.
 Look at how colorful and lovely it is.  Totally scrappy though.  I stick my hand in the bag, pull out a tumbler and stitch it down.
Here is the other side of the quilt.  So much fun.  I really have a good time with my scrap projects too.  Next time I will show you another shape which I use.  Until then, have a great day and I hope it is sew productive.

Friday, March 21, 2014

Scrap Management!

I bet you all have bags like this and then some.   I always remember that my tiny scraps cost just as much as my yardage.  I hate wasting so I have come up with a few ideas that will use those tiny scraps.
I use 1/2" hexagon papers for the teeny tiny scraps.  I don't think I will go smaller than this.  I am Ok with throwing a scrap away that does not accommodate a 1/2 inch hexagon.  I prepped a whole bunch of these beauties and have begun basting them to add to my box.
These are going to be made up into a quilt.  I have a pretty box which I throw them in and they are ready to go when I think I have enough of a variety for a scrappy quilt.  There are hundreds in the box. For somewhat bigger scraps I have another scrappy project on the go.  I will show that next time.  I encourage you to come up with inventive ways to use your scraps.  They are precious too.

Tuesday, March 18, 2014

Getting some things done!

Hello dear friends!  Last week was a very productive week as far as getting a few things done was concerned.  I finished three tops.  They were all in various stages of being complete.  The first picture is my granny squares top made out of 30's fabric and started about two years ago.  I just had to put about four rows together.  The quilt is now at the quilter - first quilt ever to be at the quilter and I am excited about it.
 I had started this quilt several years ago for my daughter.  She loved the fabric and I thought I would do a simple snowball to show it off.  I am happy with how it turned out.
 Another view of this quilt.  I made a row of blocks to add to the backing fabric too.  Here the quilt is laid out on her bed so that I could measure to see how wide the border needs to be.  I think a three inch border will be good.  I also finished a spool quilt featured on Moda bake shop, but more on that next time I post.  I hope you are having a great sewing week.

Monday, March 10, 2014

Cushion Swap!

Our cushion swap on Saturday was a success.  The recipient of my cushion was very happy!  That makes me very happy.
Miss Emily made the cushion I received and she did such a wonderful job.  I am thrilled with it.  She is such a neat and accurate stitcher.  Thanks Emily!!!  The pattern comes from the book Vintage Quilt Revival.  The fabric is Scrumptious by Camille Roskelley!  It's soooo pretty!

Thursday, March 6, 2014

A Cushion Cover with Hexagons!

I have to make a cushion cover for our Swap Club on Saturday.  It holds every two months, and I always leave my project to the last minute.  You know, the rock for my back needs to become heavier before I do anything about it.  Lol.
The agonizing this time was about what pattern to use.  I finally settled on one from "Pillow Pop".  Well I looked at a picture and then did my own thing.  Sort of the right size hexie's!  etc.
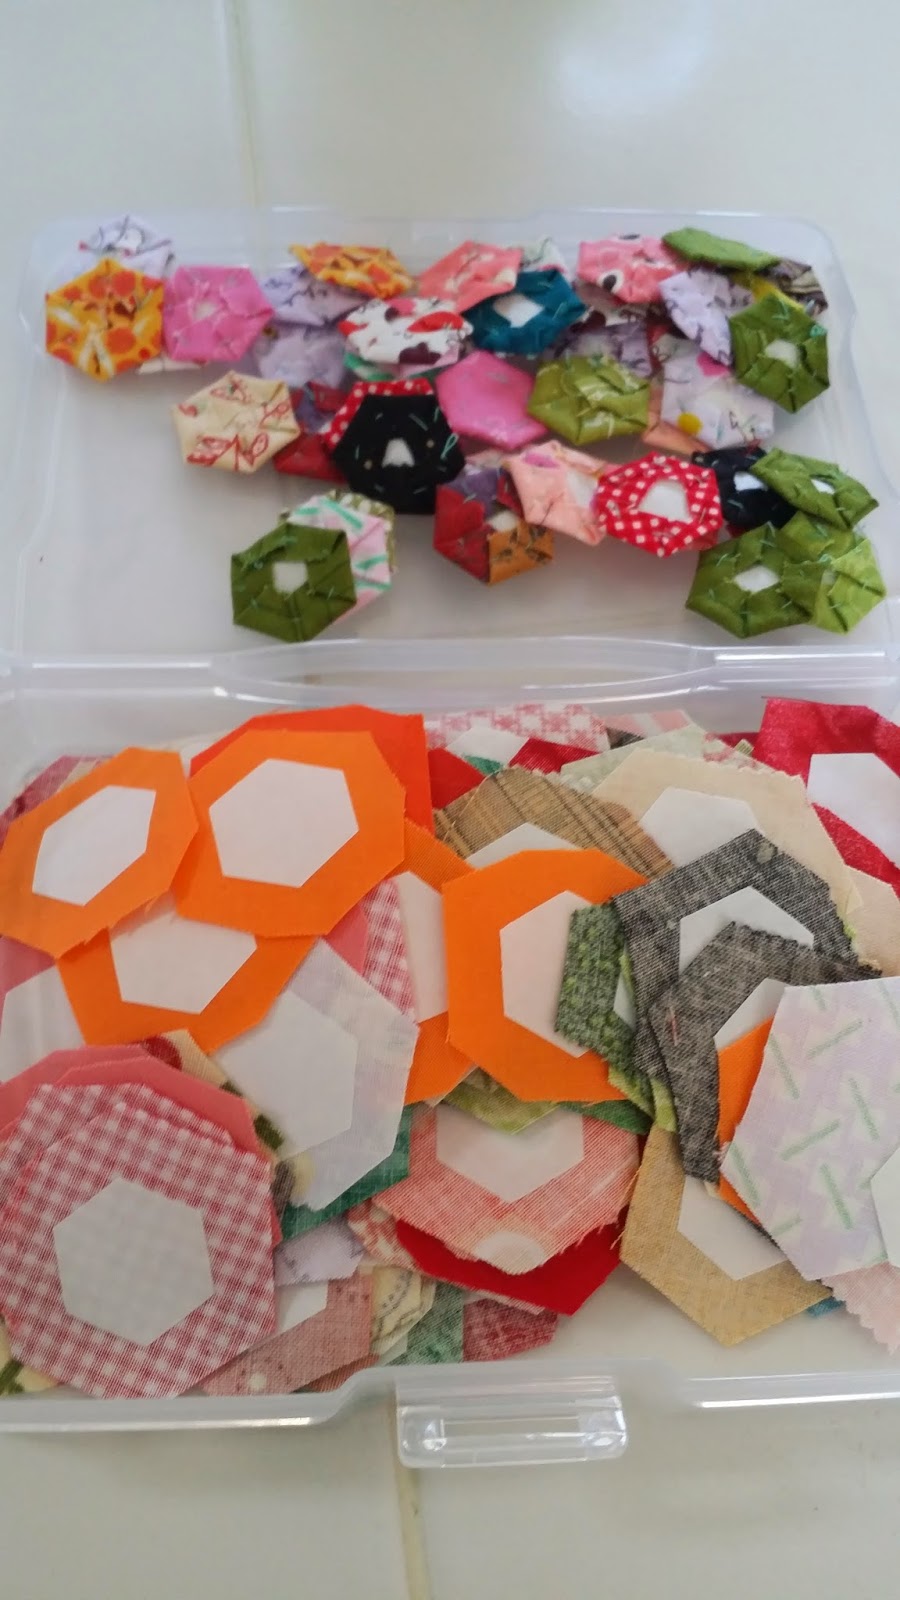
These hexagons are quilted as you go.  You have a small and large hexagon.  Cut a piece of batting the same size as the small hexagon.  Center the two on top of the large hexagon.  Large hexagon is wrong side up, the small hexagon is right side up with the batting between the two.  Then fold the large sides in half and then pull down over the small hexagon.  Pin the sides as you work your way around the shape.  You can them machine the sides down, appliqué them down or use a decorative (crazy quilt method) stitch.  I chose to machine the edges down because I am on a time budget.  The next step is to make your rosette.  Small overhand stitches - stitch down six hexagons to the sides of a center hexagon.


 Now the sides get stitched together and your flower is complete.
I chose a Moda solid in white because the theme of the pillow is "Spring" and so I wanted to cushion to look bright and fresh.  I placed the rosette off center and machine stitched it to the background.
I added a layer of batting and muslin for quilting purposes.   Next I machine quilted around the shape in concentric circles following the shape of the Rosette.  When I was done with that I used a variegated thread and hand quilted around the Rosette.
 I love the secondary pattern the quilting makes.  Almost like chevrons.  I used my machine foot as a guide to measure the distance between the lines.
 I did a scrappy binding using all the solids which I used in the large hexagon fabrics.
 20" x 20" pillow form inserted.
 I am happy with the outcome and it did not take a month of Sundays to make.  Thanks for stopping by to have a look.  Hope you are having a good sew day!

Tuesday, March 4, 2014

A Couple of POTC Blocks and an Oblong Hexagon!

My little fingers have been sewing away furiously.  I revisited my POTC blocks and made two more of them.
 I think I have eleven done.  They really are time consuming but well worth the effort in my opinion.  I must up the ante on this project and make speedier progress or else it is going to become a lifelong project.
I have nine of these hexagon shapes put together.  I prepped another five - ironed on the freezer paper and cut out.  The outer fabric in this one is more orange than red.  The photo does not show the color true to life.  It is a pretty one.  I hope your projects are coming along nicely.  Thanks for stopping by to visit.

Saturday, March 1, 2014

Soupçon Progress and Hexie Votes!

I asked opinions in my last blog about setting hexagon colors!  You were so gracious letting me know what you thought.  Thank you so much.  The options were - in order of winning colors - white/ off white, dark blue and black.  I am going to be auditioning those three colors and make a selection from there!  You all ROCK!

Faeries and Fibres blog has an awesome sew a long called Soupçon!  I got a little behind but have almost caught up now.  I am only one step behind where we should be and that is the pieced border which I am excited about tackling.  Here is my Soupçon so far.  I love that it has EPP, appliqué, patchwork, and embroidery in the quilt.  It is so much fun to work on.  I have not made a medallion style quilt before and I tell you, I am hooked.  Especially when each part is so different.  It is fun to work on and does not get boring.  Thanks Karen for  such a wonderful project.